Brinell Hardness Test vs Rockwell

By Engaged Expert
Lee ManghamLee Mangham is the Technical Manager at the Element Sheffield laboratory, he is responsible for a wide variety of technical content and has over 30 years of experience in mechanical testing.
Created to measure the physical properties of metals, hardness testing is one of the most widely used material testing methods. The two most common types of testing to accurately determine a metal’s hardness, and therefore its ability to resist wear and ensure its safety and reliability, are the Brinell hardness test and the Rockwell hardness test.
Brinell hardness test ASTM E10 or BS EN ISO 6506-1
Brinell hardness (HBW) is a scale used to provide a numerical value to the level of hardness of a material. The method for conducting a Brinell hardness test is defined fully in ASTM E10 and BS EN ISO 6506-1.
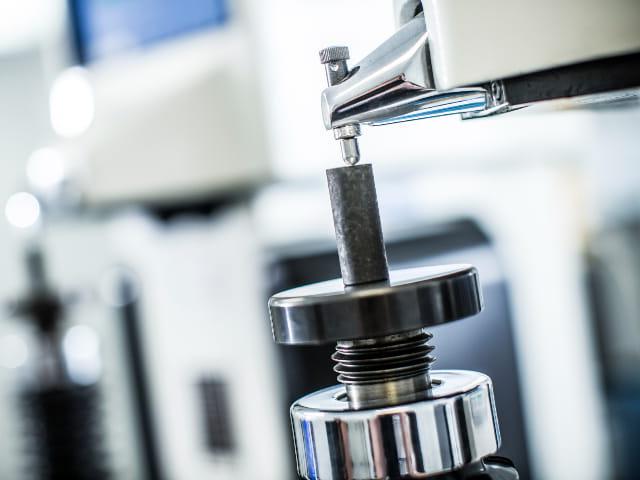
To conduct the test, a Brinell indenter is pressed against the test specimen under a predetermined load for a fixed amount of time. The indenter is a hardened Tungsten steel ball with a standardized diameter with a force between 9.807N to 29420N depending on the test material and the diameter of the ball.
The load is usually applied for 10 to 15 seconds when testing steel or steel materials, during which there must be no vibration. The resulting indentation is then measured.
Rockwell hardness test ASTM E18 or BS EN ISO 6508-1
Rockwell hardness testing is measured using the Rockwell hardness scale with the method defined in ASTM E18 and BS EN ISO 6508-1.
Like the Brinell test, Rockwell hardness testing is performed with an indenter of a specified size applied with a specified force for a fixed amount of time. A small Tungsten steel ball (HRBW method) is used to penetrate soft materials whilst a diamond cone (HRC method) is used for harder and heat-treated materials.
The test uses a preload to establish a zero position before the main load is applied. The main load is then taken away, leaving just the preload. The Rockwell testing equipment then measures the distance traveled through the material.
“We find that the Brinell hardness test is usually our preferred method of testing if the customer requires highly accurate results and does not have a specified hardness method.”
Measuring Brinell and Rockwell tests
The Brinell test measures the width of the indentation using a microscope. This measurement is then converted into a Brinell hardness value – the ratio between the applied force and the surface of the indent – using the Brinell hardness scale.
Unlike the Brinell method, Rockwell’s method does not measure the size of the imprint, but the depth of the indentation. This measurement is then converted to a Rockwell hardness value directly on the machine.
Brinell hardness test vs Rockwell
While the two tests have similarities, there are several important differences. Both test methods are suitable for the testing of soft and medium hard materials such as aluminum, Cu alloys, and soft steel. Whilst Brinell’s method can test any type of metal, it is unable to measure hardness greater than 650 HB.
The Rockwell test is considered easier to perform and has a shorter total testing time of 10-15 seconds than the Brinell test procedure which typically takes 30-60 seconds.
Many consider the results of the Brinell method to be more accurate and reliable, especially when testing coarse materials, as the spherical indenter distributes pressure more evenly. In the Rockwell test, if the hardness of the sample is not uniform, three indents will measure the average hardness of the sample, which can affect overall accuracy.
Mechanical testing expert at Element, Lee Mangham, explains: “We find that the Brinell hardness test is usually our preferred method of testing if the customer requires highly accurate results and does not have a specified hardness method. However, as it is a more complicated test procedure whose results can be more open to interpretation, the correct preparation of the test sample, and skillful management of the test procedure and protocols, are essential."
“In general, selecting the most suitable test for the properties of the material and its intended application, and then carefully following the correct test protocol and procedures, are the two most important ways to ensure reliable results.”
Brinell hardness to Rockwell conversion
The conversion scales for Rockwell and Brinell hardness are not consistent between non-austenitic and austenitic steels and should not be confused with one another. It is therefore important to be extremely careful when comparing Brinell hardness to Rockwell. ASTM E140 gives tables for conversions between the two hardness types and material types along with others such as Vickers and Knoop. It is also important to note that all hardness conversions are an approximation.
“Selecting the most suitable test for the properties of the material and its intended application, and then carefully following the correct test protocol and procedures, are the two most important ways to ensure reliable results.”
Advantages of Brinell hardness test
- Simple surface preparation
- Easy measurement of the print diameter
- More accurate and precise final measurements are provided in the test results when compared to the Rockwell measurement
- Less chance of testing being delayed due to test equipment failing than in the Rockwell test, during which the diamond cone breaking is a possibility.
Advantages of Rockwell hardness test
- Simpler planning stage than the Brinell test method which requires decisions, such as the selection of the appropriate force, to be made
- Faster results, with an immediate reading of hardness on the Rockwell device
- Shorter test duration at 10-15 seconds compared to the 30-60 seconds Brinell test procedure
- Less damage to the test specimen or material with the test leaving only a shallow imprint compared to the Brinell test method which leaves a large, visible trace.
The Element advantage
Element offers both Brinell and Rockwell hardness testing as part of its extensive portfolio of mechanical testing services for materials that may be exposed to various wear conditions across multiple industries.
Element’s team of mechanical testing experts can advise on the most appropriate hardness testing method for your project depending on the material’s specification and intended application. The testing can then be carried out as a stand-alone program or as part of a broader mechanical testing project that includes other mechanical testing methods such as tensile and impact testing.
Element’s laboratories can assist with custom or complex setups to suit specific needs and requirements, with our experts guiding you through the entire process, from selecting and managing the most appropriate test procedure to evaluating the results.
For more information on hardness testing, please contact Element today.
Find related Resources
More from Element

Hardness Testing
Element's laboratories use a variety of micro-indentation and macro-indentation testing methods to determine the hardness of a material to deformation.

What is Hot Hardness Testing?
As the only commercial laboratory offering hot hardness testing, Element's experts are at the forefront of this unique technology.

Mechanical & Destructive Testing
Element's mechanical tests are part of our destructive testing services, they show whether a material or part is suitable for its intended mechanical applications.

Failure Analysis
Find out how Element's global team of failure analysis experts learn from the past, to help prevent failures in service.
